As event organiser, I don’t often get the chance to do any
repairs. In the absence of Carol, our leather expert, at our March event, I
agreed to repair this thick leather gunbelt. It comes complete with holster and
ammo slots and its owner tells us that he does wear it sometimes. This is our
Judy modelling it before the repair.
I took it home but when I carefully read his description of
the work to be done, I realised that he didn’t want the lining glued onto the
belt as it was now, but he wanted it stitched around the whole very long length
of the belt.
Carol jumped at the challenge but didn’t realise what a
long job it would be. Ros
Carol:
I volunteered to take a look at a leather holster belt.
Usually, I try to repair items as they were originally. In this case it had not
been sewn before but I agreed to do it.
The first thing to do was to inspect it fully. The belt itself was made of vegetable tanned leather and had some tooling patterns. The lining looked like a later addition in chrome tanned leather. This type of leather has a grey core and cannot be tooled. It had been attached most recently with some sort of rubber cement. I pulled it apart and cleaned off as much rubber cement as possible, ready for re- gluing with some water based leather bond. I had to clamp the length of the belt while this dried.
The next step was to mark where the holes would be. Luckily
there was already a handy tooled groove along which I would place the stitches.
A stitch marking wheel.
I chose this spacing as it was the same as the existing
stitches around the holster. I tested a small piece of the holster stitching
thread and found it was a man-made thread so I matched that in the rest of the
stitching, using a 1mm wide braided polyester thread.
I did not have a diamond chisel (a quicker method as you
can do about 6 holes in one go) in this wide spacing so had to pierce each of
the 427 stitches by hand with a diamond awl. When stitching, you don’t actually
punch out holes as they would stay open, you pierce the leather which then can
close up again around the thread and look much neater.
This took a while as you can imagine as the two layers of
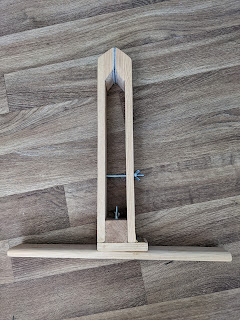
leather together were 6mm thick. I then clamped the belt in my hand made
stitching pony, threaded a needle onto each end of the first length of thread
and started saddle stitching. This is a strong stitch which holds even if a
stitch on one side breaks.

Each 60cms of stitches took 2m of thread and took about a
hour. Once the whole thing was finished, I cut down the lining leather where it
overlapped the upper part, sanded the edges to remove any remaining glue and
coloured the revealed grey chrome leather with brown dye.
The finished article:
----------------Carol, you are amazing!


.jpg)
No comments:
Post a Comment
Note: only a member of this blog may post a comment.